Tuesday, December 9, 2014

Kuttavalakki ~~Karnataka recipes

A Brahmin south Indian dish which is light on tummy yet amazingly tasty that can be served as a snack or as a breakfast. Kuttavalakki takes hardly 10 minutes to prepare and is loved by all age groups.

Kuttavalakki is Powdered poha and it has 2 versions one being what I have prepared here and is also called Gojjavalakki. The other version is  the dry kuttavalakki (a dish from Mysore) where the poha is powdered finely with other spices and served with yoghurt. Kuttavalakki/Gojjavalakki is prepared in many ways in different parts of Karnataka.

The recipe I have shared here is from my granny. My mom makes the similar poha only without powdering. This type of poha is made during festivals mainly on Janmashtami since this dish is little Krishna's favorite. :) It is also served as prasadam in many temples and when it is eaten as prasadam, Kuttavalakki actually tastes divine. I had completely forgotten about this dish since I moved here. When my neighbor brought me a bowl of Kuttavalakki few days back, I felt a longing for home and nostalgic. Now, I make it once in 3 days as a snack with a cup of coffee for hubby and he absolutely loves it.

I have used melted jaggery in this recipe instead of the grated jaggery. Usually grated jaggery is used in this dish by Bangaloreans. In our native and at mom's place, jaggery is used in Semi-Solid form and is stored in huge cans. They used to prepare jaggery from fresh sugar cane juice at every household and these days, only few homes do it. But Jaggery is still used in its purest form and can be bought at selective stores around North Canara. We call it Joni Bella. The jaggery blocks we buy at stores contain a lot of chemicals and I even found a dead insect once. (Blehh!!! ~X( ) So I usually melt the jaggery as soon as I buy, filter it when it is hot, cool it completely and store it in semi solid form.

Nutritional Information  (Approx) (per serving)
Energy  185 Calories
Fat 9 %
Carbohydrates 23 %
Dietary Fiber 3 %
Sodium 19 %
Vitamin A 8 %
Vitamin C 29 %
Calcium  4 %
Iron  22 %
Protein 6.8 Grams
Sugar 2.5 Grams


Ingredients 
Poha/Beaten Rice 2 cups
Turmeric powder a pinch
Rasam powder 1 & 1/2 teaspoons
Salt to taste
Water as required
Oil 2 teaspoons
Mustard seeds 1/2 teaspoon
Urad dal 1/2 teaspoon
Chana dal 1/2 teaspoon
Peanuts 2 tablespoons
Red chillies 2
Curry leaves(optional) 4 or 5
Tamarind pulp/paste 1 tablespoon
Jaggery melted/grated 1 tablespoon


  • Grind Poha/Beaten rice to a coarse powder. Make sure the powder is not fine. It is ok if all the poha does not get powdered.
  • Transfer the powder to a bowl, add turmeric powder, Rasam powder and salt. Mix well.
  • Add just enough water to soak the mixture. Stir once and add a little more water. Let it rest for a minute and give it another stir. 
  • Make sure you stir the mixture once or twice and sprinkle more water if the mixture gets too lumpy. 
  • In a pan, heat oil, add mustard seeds. Once they start to splutter, add Urad dal, Chana dal and peanuts. Fry till they turn slightly brown. Then add cut red chillies and curry leaves.
  • Add Tamarind pulp and jaggery. Simmer the flame and bring it to boil.
  • Add powdered poha mixture and mix well. Adjust the salt.
  • Cook under low flame for 2-3 minutes and serve hot. 
  • If you like it on the spicy side, add half a teaspoon of chilli powder.
  • Add fresh curry leaves if available, they taste better.
  • You can serve them with a cup of thick yogurt, they make the best combination.
  • If available, garnish with fresh grated coconut. It tastes extra delicious.
Oh, I had forgotten to say that I am contributing this post to the first blog hop of our lovely group. Do check out the great posts and recipes from my Blog hop friends.

Saturday, November 29, 2014

Beetroot Halwa

A delicious Indian dessert with a pleasing color, Beetroot Halwa is a wonderful and tasty treat, be it for a party or for a simple Sunday meal.

Beetroot is one of the veggies I hate to eat but still try to include in the meals only because of it's innumerable health benefits. To be honest, I also hate the way it ruins the nice creamy color of my cutting board while cutting/grating and the way it sprays it's color on the pure white coating of my kitchen stove top. My mum makes an aromatic and very tasty sambar with beets but it never tasted the same even when I follow her recipe. So I had to make this Halwa to consume Beets once a while since it contains a lot of nutrients like potassium, magnesium, iron, vitamins A, B6 and C, folic acid, carbohydrates, protein, antioxidants and soluble fibre.

When you are on a weight management diet, you tend to concentrate on the "Low calorie" foods but unintentionally you start to swing towards Low-fat and Low-sugar foods. It is good for your health if you manage to get all the nutrients with Low fat and low sugar diet by including different kinds of veggies and fruits. If not, it may work for a short time diet plan, but for a long time plan, your body will be deprived of so many nutrients. You will definitely lose a lot of weight, but not in a healthy way. For that moment, you may feel light, lean and weight-less but that will affect your health in the long run. So, you need to be very careful about what you choose to eat or cook. It will take a lot of effort and a lot more time to lose weight.

Beets are one of those veggies which can provide your body with a lot of nutrients you need everyday and Halwa is the recipe I chose to include it in my diet. As usual, I have not loaded the halwa with sugar or Ghee but a little amount once a week would not hurt your diet. If you are not on a weight loss regime, feel free to increase the quantity of sugar and ghee as you please.

Nutritional Information  (Approx) (per serving)
Energy  180 Calories
Fat 5 %
Carbohydrates 4 %
Dietary Fiber 11 %
Sodium 3.5 %
Vitamin A 2 %
Vitamin C 4 %
Calcium  16 %
Iron  2 %
Protein 4 Grams
Sugar 13 Grams


Ingredients 
Beetroots 2 large
Milk 2 cups
Sugar 2 tablespoons
Ghee 1 teaspoon + 1 teaspoon
Cardamom powder 1/2 teaspoon
Nuts of your choice and raisins a handful


  • Grate Beetroot. Heat a pan, add grated Beet and milk. Cook under simmer for 10 minutes.
  • Add sugar and give it a mix. Cook under medium flame till most of the milk is evaporated.
  • Also add Ghee and Cardamom powder and mix well. Cook for 5 more minutes till the aroma starts to fill up.
  • Heat ghee in a pan and add nuts and raisins. Fry till the cashew nuts turn slightly brown.
  • Add them to the halwa and give a stir. Serve hot or chilled or with some vanilla Ice cream.
  • There are many variations to this recipe and one of them being adding Khova. You can also add more nuts.
  • If you are lactose intolerant, you can cook the beets in water.
  • You can also add slightly roasted Poppy seeds if you dont like the soft halwa.

Monday, November 24, 2014

Neer Dosa

Thin, light, soft and extremely tasty, Neer Dosa is one of the popular Dosa varieties of Karnataka. The texture of Neer Dosa is delicate and is simply delightful to have as a Breakfast or at any time of the day.

It has been almost 7 months since we moved to Norway. From past 2 months, I have been missing my mum and her food very badly. My granny is from Mangalore and my mum learnt many Mangalorean dishes from her. One of them being Neer Dosa and my mum makes the best Neer Dosa I've ever tasted. :D I have tasted Neer Dosa from quite a lot of Restaurants and Hotels and also at my work place, but none of them was better than my Mum's dosa. =P~ Anyway, I had this craving for my mum's Neer Dosa and there was no other way to eat it other than making it myself.


Neer Dosa is pretty simple to make. Though the recipe does not call for fermentation overnight, it is a fail-safe way to make sure the batter is perfect. If the rice is not soaked well, the dosa cracks and does not cook well. If the batter is too runny, then Dosa sticks to the pan. If the batter is too thick, then it gives you thick Dosas and not the thin, soft ones. I love Neer dosa soft but naveen likes it a little crunchy. So I cook them in simmer till they turn slightly brown and crispy. Neer Dosa is usually served with a non-veg curry in Non-vegetarian homes. We, vegetarians serve Neer Dosa with Melted jaggery or Thick coconut chutney and sometimes with banana or Mango rasayana.

U know you have succeeded in making perfect Neer dosa when your Neer Dosa has tiny holes all over and soft yet well cooked. When you stack Neer Dosa, make sure you don't put one on top of the other since they stick to each other and it is impossible to separate them. They taste best when they are hot and fresh but they even make good lunch box dish since they taste almost as good as the ones that were hot.
*Please don't mind the quality of the pics. Morning's are usually rush since Naveen leaves very early and I had to take the pics of making the batter in a hurry.

Nutritional Information  (Approx) (per serving)
Energy  78 Calories
Fat 2 %
Carbohydrates 7 %
Dietary Fiber 1 %
Sodium 1 %
Vitamin A 0 %
Vitamin C 0 %
Calcium  1 %
Iron  6 %
Protein 1.8 Grams
Sugar 0 Grams


Ingredients 
Raw Rice (preferably Sona Masuri) 1 & 1/2 cups
Grated Coconut 1/2 cup
Salt to taste
Water as required
Oil to grease the pan

  • Wash and soak overnight or at least 6 hours.
  • Drain the water and grind the rice along with grated coconut to a fine paste. Add water as required while grinding. To check if the paste is smooth, you can rub the batter between fingers. If the paste is course, then grind till it's smooth.
  • Add water to make the batter to buttermilk consistency. The consistency of the batter is perfect if it does not stick to the back of the ladle. Then add salt and mix well.
  • Heat a Dosa pan/Tava, grease it with oil or ghee. Pour a ladleful of batter on the pan. There is no need to spread the batter with the back of the ladle. Cook in medium flame. Once the sides start to leave the pan, fold in half and serve hot.

  • If you make a large batch of batter, do not add salt to the batter which you are going to refrigerate. That will keep the batter unspoiled for almost a week. 

Saturday, November 22, 2014

Gobi Manchurian

Gobi Manchurian is an Indo Chinese appetizer which is most popular in India. Slightly crunchy cauliflower with lip-smacking, sticky, tangy and spicy sauce, Gobi Manchurian gives you a punch of mouthful of flavors and also the experience of the fusion of Indian and Chinese flavors.

I had to take a short break from blogging for personal reasons but not a day passed by without me missing writing posts. Needless to say, I took a long time to write this post and decided to post this recipe because it is healthier version of the regular Gobi Manchurian. Many foodies and bloggers hate people like us who modify the original recipes trying to make them healthier and guilt-free. They think we change the taste of authentic dishes and make them less desirable. If you are both health freak and a foodie like me, you will definitely understand the reason why the world started the word "Guilt-free". :D Nevertheless, I have other reasons for modifying the authentic dishes one of them being; creating a guilt free version of an authentic recipe without changing the taste, the level of satisfaction it gives and making it healthier, is a tough challenge. Who does not love challenges? ;)

The chef who inspired me most recently is Teresa Cutter from The Healthy Chef series. Also, one of the greatest chef's of all time Roger Vergé says "A recipe is not meant to be followed exactly — it is a canvas on which you can embroider". Anyone can follow the measurements of Ingredients and steps of a dish and prepare it. I believe that as long as the dish you have modified is as good as the original (or better!!), you can play around with ingredients. Who knows, you may even create dishes of your own and name it yourself! /:) Anyway, this recipe is not modified too much except that the battered Gobis are baked to crisp instead of deep frying and I have garnished with coriander leaves instead of Spring onions only because I could not find them in the market. :) The recipe is very simple and tastes just like the one you enjoy it as an evening snack on the streets of Bangalore and as a starter at pricey restaurants anywhere in India.

Nutritional Information  (Approx) (per serving)
Energy  145 Calories
Fat 7 %
Carbohydrates 20 %
Dietary Fiber 4.3 %
Sodium 230 mg
Vitamin A 11.2 %
Vitamin C 11.3 %
Calcium  21.9 %
Iron  8.1 %
Protein 3.9 Grams
Sugar 6.6 Grams


Ingredients 
Cauliflower  1 medium
Corn flour(for batter) 1/4 cup
Wheat flour or All purpose flour 3/4 cup
Baking powder  1/4 teaspoon
Salt to taste
Garam masala (optional) 1/2 teaspoon
Chilli powder 1/2 teaspoon + 1/2 teaspoon
Ginger garlic paste 1 teaspoon
Water as required
Soy sauce 2 tablespoons
Tomato sauce 2 tablespoons
Chilli sauce 1 tablespoon
Sugar 1 teaspoon
Corn flour (for sauce) 1 & 1/2 teaspoons
Oil 2 teaspoons
Onion chopped 1 small
Cilantro or Spring onion to garnish


  • Cut the cauliflower into bite sized pieces. Blanch them in salt water for 5-6 minutes.
  • Mix Corn flour, wheat flour, Baking powder, salt, Garam masala, chilli powder, half of ginger garlic paste and water to make a thick batter.
  • Coat all the florets in the batter and transfer it to a baking plate lined with baking sheet.
  • Bake the florets in a Preheated oven at 400 degrees for about 30 minutes or till the florets get evenly browned. (Make sure to flip them halfway through baking). 
  • Meanwhile, mix together soy sauce, tomato sauce, chilli sauce, sugar, and salt.
  • Toss the florets to the middle of the oven for few minutes to make them crispier.
  • To thicken sauce, mix corn flour with 1/4 cup of water and make sure no lumps are formed.
  • In a pan, heat oil and add chopped onion. Once the onion looks translucent, add the remaining ginger garlic paste.
  • Add the sauce mixture and corn flour mixture and mix well. Check for salt more and add if needed.
  • Bring the mixture to boil under low flame. Cook till the sauce is thick and remove from heat.
  • Add the baked florets to the sauce, toss them well. Garnish with chopped spring onion or cilantro and serve hot.

  • You can deep fry the florets instead of baking them.
  • I have garnished with cilantro since Spring onions are not available here. Do garnish with spring onions if you can get your hands on them.
  • Be careful while adding Soy sauce and add little quantity since they change the color of the dish.
  • Skip either chilli sauce in sauce or chilli powder in batter if you desire less spicy dish.
  • Make sure the cauliflower florets are blanched well.

Tuesday, November 4, 2014

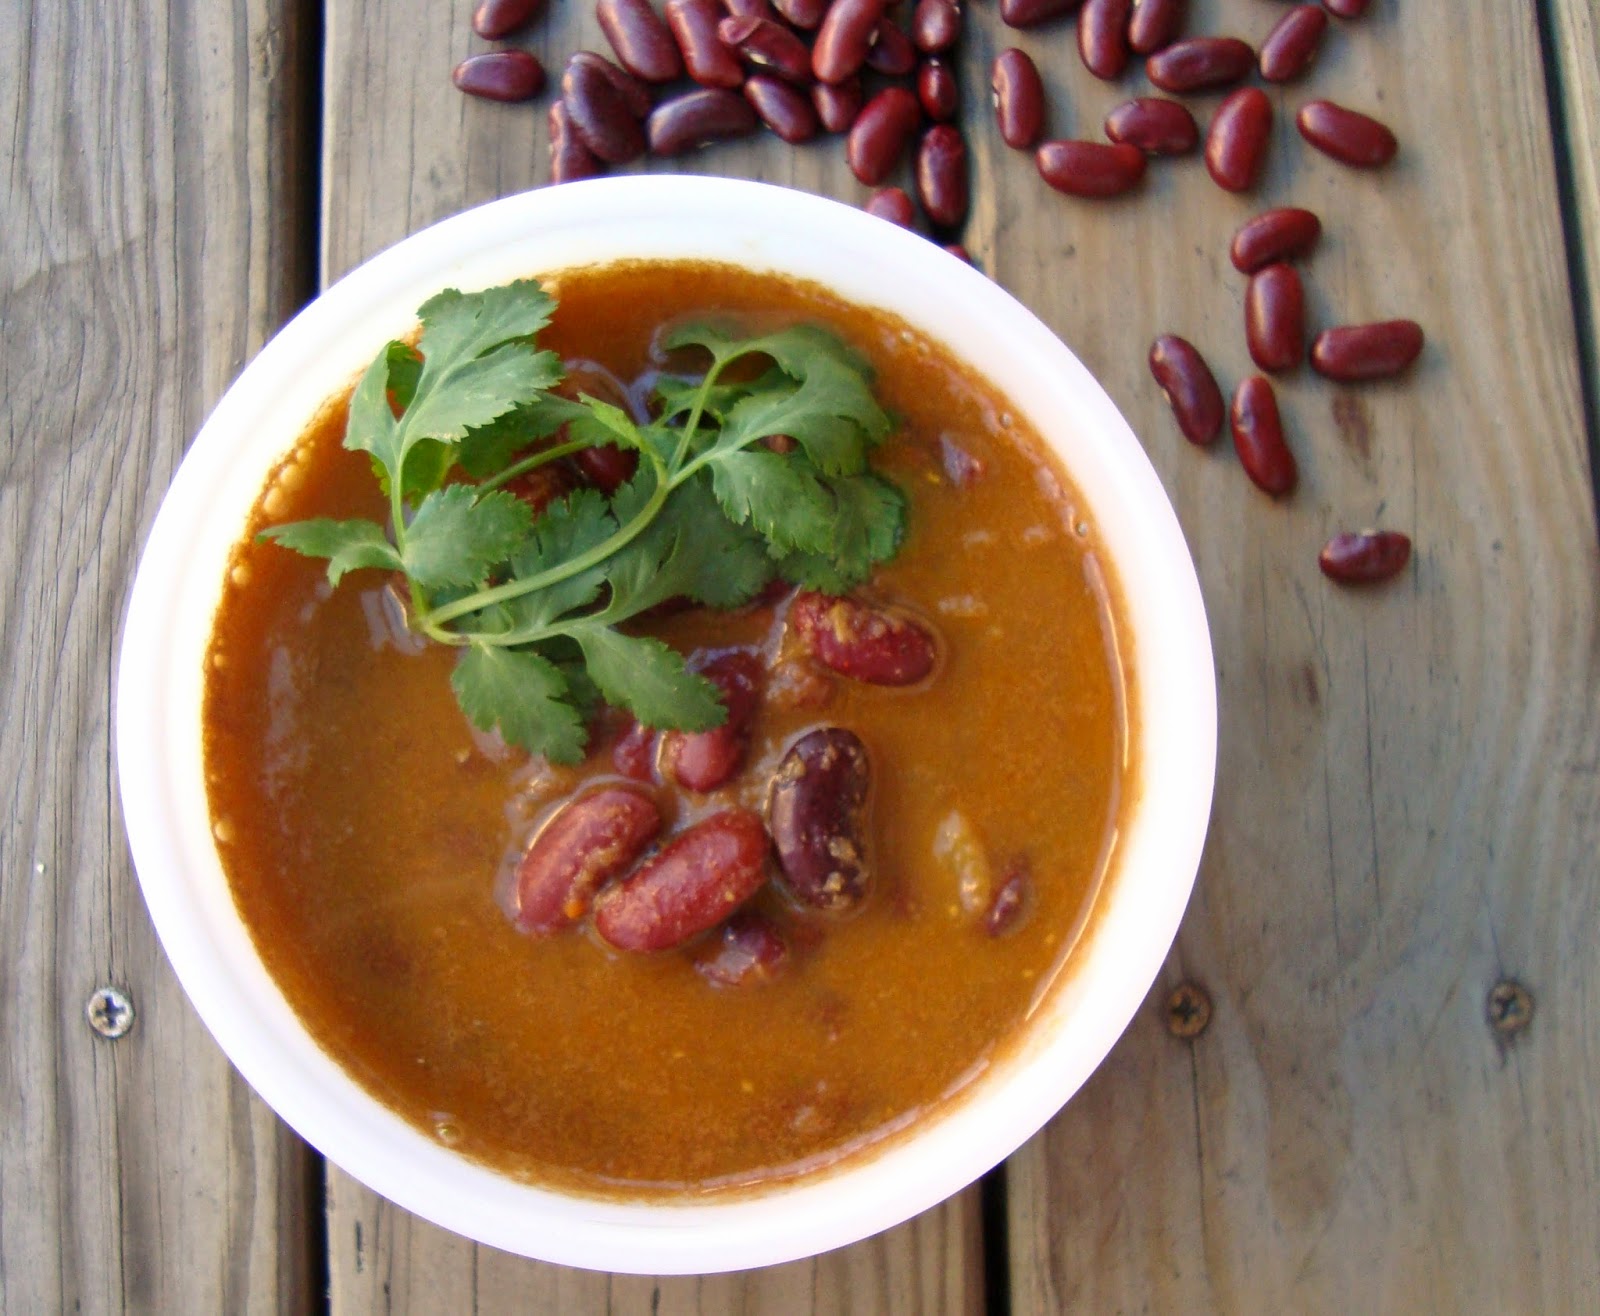
Rajma Masala ~~Punjabi recipes

A popular North Indian vegetarian curry, a nutritious and filling dish made from the humble basic ingredients. Rajma masala served with a pot of steamed rice is a super-comforting food and a hearty vegetarian meal.


Red Kidney beans also called as Rajma is one of the world's healthiest foods and is filled with amazing health benefits. These red kidney beans are extremely tasty and because they absorb the flavors of seasonings and spices, they make a great main ingredient in simmered/slow cooked dishes. When you see the list of benefits waiting for you from this simple beans, you will make sure to include in your regular diet. To list a few health benefits:

  • Packed with fiber: A 100 grams of kidney beans contains 45.3% of fiber making it a fiber star. Hence it improves the metabolism, prevent digestive problems and helps detoxify the body.
  • Lowers the risk of heart attack: Kidney beans are rich in folic acid and also low in fat. Folic acid or Folate helps reduce cholesterol levels and protects your heart.
  • Prevents Cancer: Kidney beans are loaded with anti-oxidants. This helps to reduce free radicals in the body. Kidney beans also contain Vitamin K which is known to reduce the risks of cancer.
  • Brain function: Vitamin K in kidney beans is beneficial in improving the brain function. Kidney beans also contain Thiamine which aids in healthy nervous functioning.
  • Reduces Blood-sugar level: Kidney beans have soluble fiber that can prevent blood sugar levels from going high after heavy meals. It is also a good source of protein which helps in reducing blood sugar levels.
  • Increases Bone strength: The high content of manganese and calcium in Kidney beans aids in developing stronger bones. 
  • Healthy skin: Kidney beans contain considerable amount of flavanoids which act as an anti-wrinkle. The antioxidants present in kidney beans have anti-aging properties and keeps the skin healthy and young.
  • Weight loss benefits: Red kidney beans is rich in Fiber, Protein, complex carbohydrates, vitamins and minerals. This promotes the low storage of fat and decrease insulin levels helpsing to maintain a healthy weight. 
Phew!! #:-S that was a huge list!! I did not even include so many other benefits of kidney beans on your hair, nails. Well, these are good enough number of reasons to start off with adding kidney beans in your everyday food. After searching for more than a month, I found these precious Red beans in an Arabic shop and I cannot describe how happy I was! I had found the light specked kidney beans here before but they are not as good as Rajma for me. I had missed these beauties for sometime and now I have it on my diet at least thrice a week. I make stew, curry, parathas, Biriyani, Dips, chutney, raita and what not. Of all these, the curry which is Rajma masala is favorite for both my husband and I. 

I have tried my best to replicate the Rajma masalas that I have tried in some restaurants in Bangalore. You can make any modification to the recipe as you wish. Hope you enjoy this dish as much as I do.

Nutritional Information  (Approx) (per serving)
Energy  120 Calories
Fat 5 %
Carbohydrates 6 %
Dietary Fiber 3 %
Sodium 25 %
Vitamin A 0 %
Vitamin C 30 %
Calcium  6 %
Iron  10 %
Protein 5 Grams
Sugar 0 Grams


Ingredients 
Red kidney beans 3/4 cup
Oil 1 teaspoon + 1 teaspoon
Cumin seeds 1 teaspoon 
Cloves 2
Cinnamon a small stick
Cardamom 1
Onion chopped 1
Green chillies slit 2
Ginger garlic paste 1 teaspoon
Tomato chopped 1
Bay leaf 1
Salt to taste
Coriander powder 1/2 teaspoon
Turmeric powder 1/2 teaspoon
Chilli powder(optional) 1/2 teaspoon


  • Soak the kidney beans in water for at least 6 hours or overnight. Pressure cook them with 3 cups of water till soft.
  • Heat oil in a pan, add cumin seeds, cloves, cinnamon and cardamom. Fry for a minute.
  • Add chopped onion and green chillies. Once the onion looks translucent, add ginger garlic paste and fry.
  • Add chopped tomatoes and fry till the tomatoes are soft.
  • Let the mixture cool for a while. Grind the mixture to a smooth paste.
  • Heat oil in the same pan and add the bay leaf. 
  • Also add the ground paste and fry till the oil leaves the masala.
  • Add salt, coriander powder, turmeric powder and chilli powder and bring the mixture to boil.
  • Add the rajma along with cooked water and mix well.
  • Simmer the heat and cook for about 10 minutes and serve hot with steamed rice.

Thursday, October 30, 2014

Pomegranate Power Smoothie

A healthy, filling and refreshing smoothie for a quick breakfast. This Pomegranate Smoothie is diabetic friendly, extremely nutritious filled with anti-oxidants and makes a great take away for your mid-morning snack.

Pomegranates have been enjoyed for thousands of year and they are packed with even more nutritional punch than they are given credit for. Pomegranates being an antioxidant super food contains excellent amount of Vitamin C. So, they are known to benefit your heart in many ways including improving blood flow and controlling blood pressure levels. Enjoy it as a healthy snack or as a topping for your salad or even as a smoothie, they are a delicious treat.


I have never personally liked Pomegranates simply because they are hard to deseed and sometimes they are quite sour no matter how ripened or big the fruit is. I liked drinking Pomegranate juice and I usually would juice the fruit until recently. There was an article in one of my online libraries saying you lose most of the nutrition from the Pomegranate if you discard the crunchy seeds. Well, I had wasted loads of those seeds already so this time, I decided to make smoothie instead of Juice.

Almonds are my all-time favorite while making any smoothie (They give you an extra crunch if the smoothie is all "Smooth"!!) and Yogurt is added to make it filling and nutritious. I have added honey to balance the sourness. You can skip honey and you will definitely be surprised just how sweet it tastes without any added sugar. Please feel free to modify the recipe as per your liking.

Nutritional Information  (Approx) (per serving)
Energy  152 Calories
Fat 7 %
Carbohydrates 8 %
Dietary Fiber 16 %
Sodium 2 %
Vitamin A 2 %
Vitamin C 18 %
Calcium  15 %
Iron  1 %
Protein 5.42 Grams
Sugar 14 Grams


Ingredients 
Pomegranate seeds 2 cups
Plain Yogurt 150 grams
Almonds 2 tablespoons
Honey (optional) 1 teaspoon

  • Wash and dry roast almonds. Place Pomegranate, almonds, Yogurt and honey in a blender.
  • Process until smooth and serve.

  • You can add chilled green tea and flax seeds to this smoothie to make it more healthy.

Monday, October 27, 2014

Cauliflower Pepper fry

A lip smacking and spicy cauliflower dish which is a best accompaniment for Rice and Sambhar. This Cauliflower Pepper fry takes very little time to prepare and tastes great when served hot.

Cauliflower is my family's all time favorite Veggie and we love all the spicy dishes that has cauliflower in them. There is always either a cauliflower or a Broccoli in my fridge since they are rich in nutrients (as you can see in the nutritional information) and you can make great side dishes within minutes. I made this recipe to participate in a 2nd blog anniversary give away at http://www.sujithaeasycooking.com/. The recipe has been adapted from Sujitha's blog. You can find the original recipe here.

I have even tried adding Peanuts to roast and grind masala and it tastes divine. You can modify the recipe however you like but make sure the vegetable is washed properly for safety reasons.

Nutritional Information  (Approx) (per serving)
Energy  73 Calories
Fat 4 %
Carbohydrates 3 %
Dietary Fiber 17 %
Sodium 31 %
Vitamin A 0 %
Vitamin C 118 %
Calcium  4 %
Iron  4 %
Protein 4 Grams
Sugar 0 Grams


Ingredients 
Water as needed
Salt to taste
Cauliflower florets 1 cup
Oil 2 teaspoons
Turmeric powder 1/2 teaspoon
Onion chopped 1

To Roast and Grind
Black Peppercorns 1 teaspoon
Red chillies 2
Coriander seeds 1 teaspoon
Cumin seeds 1/2 teaspoon
Cloves 2
Cinnamon a 1 inch stick


  • Dry roast and grind all the ingredients under "Roast and grind". 
  • Boil a pot of water and add turmeric and salt. Add cauliflower florets as soon as the water starts to boil, let it stay for 2-3 minutes. Drain the water and keep cauliflower aside.
  • In a pan, heat oil and add chopped onion.,
  • Once the onion looks translucent, add cauliflower florets and fry. 
  • Add the ground powder and mix well. Make sure the powder is sprinkled on all the florets. Fry for few minutes under low flame. 
  • Serve hot and enjoy!

  • I have not added curry leaves since it is not available here. You can add it while adding onion.

Saturday, October 25, 2014

100th Post!!! Hot Milk Sponge Cake

This entry marks a special occasion - 100th blog post which is an important milestone and an opportunity to look back and see how things have changed since I started Poorni's Easy Cookbook. Thank you all for joining me on this cooking journey and I hope you all continue to enjoy my blog.

It has been 100 posts of journey into making/modifying calorie-rich dishes into low-calorie and healthy recipes. Whats more, I made many blogger friends along the way through this blog and learnt a lot from them. I am grateful to have had an opportunity to connect with so many of you through this blog.

Moving on to the dish for this day, I made this Hot Milk Sponge cake to celebrate my 100th post. I had saved this recipe from an old half torn cookbook without cover in the city library. What is better than a hot pound of basic Sponge cake that melts in your mouth? Furthermore, this recipe does not have butter in it. You may be wondering what kind of Sponge cake can be made without butter? Well, I made it without butter and after tasting it, I had no words to describe how spongy and crumbly the cake was so I let out the excitement by punching into the air.

This is the easiest, tasty and most spongy Sponge cake you can imagine. This recipe (by the look of that cookbook!!) seems to be one of the oldest recipes that were followed probably in 50's for Sponge cake.
The cake can be refrigerated for more than 2 weeks. That is the reason I made it as a loaf. You can make it in a cake pan if you like. It tastes best with a hot cup of coffee or tea. Tastes incredible if microwaved for 30 seconds before serving.

Nutritional Information  (Approx) (per serving)
Energy  145 Calories
Fat 3 %
Carbohydrates 9 %
Dietary Fiber 1 %
Sodium 1 %
Vitamin A 2 %
Vitamin C 1 %
Calcium  1 %
Iron  2 %
Protein 2.7 Grams
Sugar 16.7 Grams


Ingredients 
Eggs 2
Sugar 1 cup
Wheat flour 1 cup
Salt 1/2 teaspoon
Baking powder 1 teaspoon
Olive oil 1 tablespoon
Milk 1/2 cup

  • Sieve and combine the dry ingredients. 
  • Beat eggs until light. Add sugar slowly and beat for 5 more minutes so that the ingredients are well-blended.
  • Add the egg mixture to the dry ingredients and mix.
  • Heat milk and add olive oil. Heat till the milk is hotter but does not start to boil..
  • Add milk-oil mixture to the batter and fold-in quickly. Make sure there are no lumps.
  • Pour the batter into greased cake pan. Bake for 30 minutes or until done at 350 deg. F.
  • Let the cake cool in the pan for 10 minutes before running the knife in the sides of the pan and flipping it on a wire rack to cool the cake completely.

You might also like:

Related Posts Plugin for WordPress, Blogger...